Let's start with NFS first.
Requirement number one is to have an NFS server available and configured. As part of the RHCE objectives you need to configure one.
The mount command for nfs shares is straight forward enough:
mount.nfs 10.168.20.227:/distro /repo - where 10.168.20.227 is an NFS server that has exported a directory called /distro to, at the very least, your computer, more likely it will be to your entire network and you want it to be mounted to /repo. Note that you can simply use mount, instead of mount.nfs.
Let's have a look now at CIFS shares. Again, you need to have CIFS shares available.
mount.cifs "//10.168.20.112/c$/" test -o user=roots dom=dev - this is the equivalent to \\10.168.20.112\c$ in windows notation, with the user roots in the domain dev. Note that you can pass the password as a parameter too, simply add to the end of the command pass=rootspassword, if you don't you'll get a prompt to enter the password.
Note that you need to install nfs-utils (yum install nfs-utils -y) to mount nfs shares and cifs-utils (yum install cifs-utils -y) to mount cifs shares.
Monday, 6 June 2011

Mount, unmount and use LUKS-encrypted file systems
Create, mount, unmount and use ext2, ext3 and ext4 file systems
In order to create a file system, you need to use the command mkfs. Depending on filesystem type you can use:
mkfs.ext2 <devicename>
mkfs.ext3 <devicename>
mkfs.ext4 <devicename>
Thus for instance, in order to create a ext4 filesystem with label MyLabel you would run the following command:
mkfs.ext4 /dev/sdc1 -L MyLabel
In order to mount this newly created filesystem to a directory called MyLabel, you would type:
mount /dev/sdc1 /MyLabel
or
mount -L MyLabel /MyLabel
Unmounting is done by the following command:
umount /MyLabel
Note that all of this mounting is temporary, so if you want to make it permanent, then you need to add it to the /etc/fstab file, e.g.
echo "LABEL=MyLabel /MyLabel ext4 defaults 1 2" >> /etc/fstab
mkfs.ext2 <devicename>
mkfs.ext3 <devicename>
mkfs.ext4 <devicename>
Thus for instance, in order to create a ext4 filesystem with label MyLabel you would run the following command:
mkfs.ext4 /dev/sdc1 -L MyLabel
In order to mount this newly created filesystem to a directory called MyLabel, you would type:
mount /dev/sdc1 /MyLabel
or
mount -L MyLabel /MyLabel
Unmounting is done by the following command:
umount /MyLabel
Note that all of this mounting is temporary, so if you want to make it permanent, then you need to add it to the /etc/fstab file, e.g.
echo "LABEL=MyLabel /MyLabel ext4 defaults 1 2" >> /etc/fstab
Add new partitions, logical volumes and swap to a system non-destructively
This objective is really more of the same as this and this. The only new part is the adding of swap space.
Again, this can be done with fdisk and parted. Let's have a look at fdisk first.
Assuming that you have device available on /dev/sdc and you want to use it all
mkswap /dev/sdc1
and now we can activate with
swapon /dev/sdc1
You can check it with
swapon -s
echo "/dev/sdc1 swap swap defaults 0 0" >> /etc/fstab
Again, this can be done with fdisk and parted. Let's have a look at fdisk first.
Assuming that you have device available on /dev/sdc and you want to use it all
- fdisk /dev/sdc
- Type p
- Type 1
- Hit enter twice
- Type t
- Type 82
- Type w
mkswap /dev/sdc1
and now we can activate with
swapon /dev/sdc1
You can check it with
swapon -s
Filename Type Size Used PriorityNow we need to add it to the /etc/fstab file, which can be done with the following command:
/dev/sda2 partition 2047992 0 -1
/dev/sdc1 partition 1044184 0 -2
echo "/dev/sdc1 swap swap defaults 0 0" >> /etc/fstab
Configure systems to mount file systems at boot by Universally Unique ID (UUID) or label
A nice and short objective.
Remember in my last post how I added a label to the my luks encrypted logical volume, I gave it the label LUKS, so I can now mount it with the following command:
mount -L LUKS /encdir
The UUID can be found by issuing the following command:
blkid - This has this edited output
So, we can also mount by using this command:
mount -U d71b791d-3f09-4419-bedd-ae9bc0ed0989
Of course, the two commands above will only temporary mount the device, so we need to edit the fstab file again.
To mount by label you can do it with the following command:
echo "LABEL=LUKS /encdir ext4 defaults 1 2" >> /etc/fstab
and to mount by UUID you need to modify the fstab file like this:
echo "UUID=d71b791d-3f09-4419-bedd-ae9bc0ed0989 /encdir ext4 defaults 1 2" >> /etc/fstab
You could also edit /etc/fstab. At any rate, make sure that you only have one entry that mounts the encrypted device.
You can test your /etc/fstab file by issuing the following command, which will attempt to mount everything on /etc/fstab: mount -a
Remember in my last post how I added a label to the my luks encrypted logical volume, I gave it the label LUKS, so I can now mount it with the following command:
mount -L LUKS /encdir
The UUID can be found by issuing the following command:
blkid - This has this edited output
/dev/mapper/volname-lvol3: UUID="d1e50970-2995-4749-b9b1-46a52169a305" TYPE="crypto_LUKS"The first device represents the logical volume itself, whereas the second device is what we are interested in, the encrypted device, thus the UUID we want is d71b791d-3f09-4419-bedd-ae9bc0ed0989.
/dev/mapper/lukslv: LABEL="LUKS" UUID="d71b791d-3f09-4419-bedd-ae9bc0ed0989" TYPE="ext4"
So, we can also mount by using this command:
mount -U d71b791d-3f09-4419-bedd-ae9bc0ed0989
Of course, the two commands above will only temporary mount the device, so we need to edit the fstab file again.
To mount by label you can do it with the following command:
echo "LABEL=LUKS /encdir ext4 defaults 1 2" >> /etc/fstab
and to mount by UUID you need to modify the fstab file like this:
echo "UUID=d71b791d-3f09-4419-bedd-ae9bc0ed0989 /encdir ext4 defaults 1 2" >> /etc/fstab
You could also edit /etc/fstab. At any rate, make sure that you only have one entry that mounts the encrypted device.
You can test your /etc/fstab file by issuing the following command, which will attempt to mount everything on /etc/fstab: mount -a
Create and configure LUKS-encrypted partitions and logical volumes to prompt for password and mount a decrypted file system at boot
In the past two posts, I have explained how to create a primary or logical partition or a logical volume, so you'll need to create one of them and fill it with random data for security reasons, note that this could take quite a while to complete. Since I already have a few logical volumes available, I'll use them. This has the upside of not taking very long as they are fairly small. Let's fill it with random data then:
Once this is completed, you can create your LUKS partition with the following command:
cryptsetup luksFormat /dev/volname/lvol3 -- you'll get the following output. Just follow the instructions
cryptsetup -vv luksOpen /dev/volname/lvol3 lukslv
You now have an encrypted logical volume called lukslv.
Let's give this badboy a file system:
mkfs.ext4 /dev/mapper/lukslv -L LUKS
Note how I have give it a label (-L LUKS), this is not necessary but can be helpful.
Next stop, /etc/crypttab.
echo "lukslv /dev/volname/lvol3 none" >> /etc/crypttab
will set up this encrypted logical volume at boot time.
You can now add the device to the /etc/fstab file so that it is mounted on boot up.
echo "/dev/mapper/lukslv /encdir ext4 defaults 1 2" >> /etc/fstab
I have created a directory called /encdir to test this.
If you still remember your passphrase, you can reboot now.
init 6
You'll get this prompt when booting up, just enter your passphrase and you are good to go:
dd if=/dev/urandom of=/dev/volname/lvol3 bs=1M
Once this is completed, you can create your LUKS partition with the following command:
cryptsetup luksFormat /dev/volname/lvol3 -- you'll get the following output. Just follow the instructions
WARNING!Make sure that you remember your passphrase, you'll need it soon enough. Now, create the mapping to the encrypted device, logical volume in this case, by issuing the following command:
========
This will overwrite data on /dev/volname/lvol3 irrevocably.
Are you sure? (Type uppercase yes): YES
WARNING!
========
This will overwrite data on /dev/volname/lvol3 irrevocably.
Enter LUKS passphrase:
Verify passphrase:
cryptsetup -vv luksOpen /dev/volname/lvol3 lukslv
You now have an encrypted logical volume called lukslv.
Let's give this badboy a file system:
mkfs.ext4 /dev/mapper/lukslv -L LUKS
Note how I have give it a label (-L LUKS), this is not necessary but can be helpful.
Next stop, /etc/crypttab.
echo "lukslv /dev/volname/lvol3 none" >> /etc/crypttab
will set up this encrypted logical volume at boot time.
You can now add the device to the /etc/fstab file so that it is mounted on boot up.
echo "/dev/mapper/lukslv /encdir ext4 defaults 1 2" >> /etc/fstab
I have created a directory called /encdir to test this.
If you still remember your passphrase, you can reboot now.
init 6
You'll get this prompt when booting up, just enter your passphrase and you are good to go:
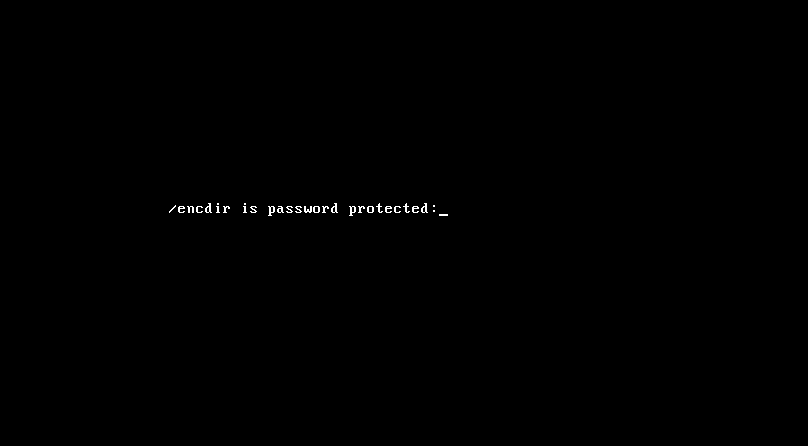
Create and remove physical volumes, assign physical volumes to volume groups, create and delete logical volumes
This is another objective that is not very useful by itself, after all once you create a logical volume, you still have to create a file system and mount it, anyway, let's get cracking.
Assuming you have an empty disk you can simply do the following to create a physical volume:
pvcreate /dev/sdc - this assumes that you have a a device called /dev/sdc
This is not very useful, namely to have a single physical volume, the only thing you have done is given yourself the oportunity to add more storage later, which is not actually a great thing, but for this objective you are better off with at least two disks.
Before we move any further, let's cover the remove physical volumes objective:
pvremove /dev/sdc
There are limitations to what the command can do, e.g. don't expect it to remove a physical volume that has a volume group.
Note that the -ff option will remove it almost no matter what, use at your own risk.
You can list the physical volumes with the following commands:
pvs
pvdisplay
Assuming that you have created two physical volumes, /dev/sdc & /dev/sdd, we can create a volume group like this
vgcreate volname /dev/sdc /dev/sdd
Alternatively, you could this to mimic a real life situation where you create a logical volume, run out of space and need to extend, in which case you add a new physical volume to the volume group:
vgcreate volname /dev/sdc - this creates the volume group volname
vgextend volname /dev/sdd - this adds the /dev/sdd phyical volume to the volname volume group
Say you made a mistake and you actually wanted to add /dev/sde rather than /dev/sdd to volname, just run the following
vgreduce volname /dev/sdd - needless to say that there will be limitations to this command as well
You can list the volume groups with the following commands:
vgs
vgdisplay
And finally we come to the useful part, the logical volumes, by now, you probably have sussed out what the commands are going to be: lvcreate, lvremove, lvs, lvdisplay, 100% right.
lvcreate -l 10%VG volname -n lvol1 - This will create a logical volume called lvol1 that is 10% the size of the volumegroup volname.
lvcreate -L 500M volname -n lvol2 - This will create a logical volume called lvol2 that is 500M, this will only work if there is enough free space in volname.
lvcreate -i 2 -l 10%FREE volname -n lvol3 - This will create a logical volume called lvol3 that is 10% of the size of the space left in volname. The -i 2 switch will ensure that volume group spans two physical volumes, again this will only work if there are two or more physical volumes.
You've just realized that you wanted a bigger lvol3, no problem, just extend it with:
lvextend -l 20%FREE /dev/volname/lvol3
The lvreduce command behaves in a similar manner
In order to delete the lvol3 you would type:
lvremove /dev/volname/lvol3
or
lvremove /dev/mapper/volname-lvol3
Assuming you have an empty disk you can simply do the following to create a physical volume:
pvcreate /dev/sdc - this assumes that you have a a device called /dev/sdc
This is not very useful, namely to have a single physical volume, the only thing you have done is given yourself the oportunity to add more storage later, which is not actually a great thing, but for this objective you are better off with at least two disks.
Before we move any further, let's cover the remove physical volumes objective:
pvremove /dev/sdc
There are limitations to what the command can do, e.g. don't expect it to remove a physical volume that has a volume group.
Note that the -ff option will remove it almost no matter what, use at your own risk.
You can list the physical volumes with the following commands:
pvs
pvdisplay
Assuming that you have created two physical volumes, /dev/sdc & /dev/sdd, we can create a volume group like this
vgcreate volname /dev/sdc /dev/sdd
Alternatively, you could this to mimic a real life situation where you create a logical volume, run out of space and need to extend, in which case you add a new physical volume to the volume group:
vgcreate volname /dev/sdc - this creates the volume group volname
vgextend volname /dev/sdd - this adds the /dev/sdd phyical volume to the volname volume group
Say you made a mistake and you actually wanted to add /dev/sde rather than /dev/sdd to volname, just run the following
vgreduce volname /dev/sdd - needless to say that there will be limitations to this command as well
You can list the volume groups with the following commands:
vgs
vgdisplay
And finally we come to the useful part, the logical volumes, by now, you probably have sussed out what the commands are going to be: lvcreate, lvremove, lvs, lvdisplay, 100% right.
lvcreate -l 10%VG volname -n lvol1 - This will create a logical volume called lvol1 that is 10% the size of the volumegroup volname.
lvcreate -L 500M volname -n lvol2 - This will create a logical volume called lvol2 that is 500M, this will only work if there is enough free space in volname.
lvcreate -i 2 -l 10%FREE volname -n lvol3 - This will create a logical volume called lvol3 that is 10% of the size of the space left in volname. The -i 2 switch will ensure that volume group spans two physical volumes, again this will only work if there are two or more physical volumes.
You've just realized that you wanted a bigger lvol3, no problem, just extend it with:
lvextend -l 20%FREE /dev/volname/lvol3
The lvreduce command behaves in a similar manner
In order to delete the lvol3 you would type:
lvremove /dev/volname/lvol3
or
lvremove /dev/mapper/volname-lvol3
List, create, delete and set partition type for primary, extended, and logical partitions
As with many things in Linux, there are many ways of performing the tasks needed to master this objective. In general you will either use fdisk or parted.
List Partitions:
fdisk -l - will provide a list of partitions for all devices in the system
fdisk -l /dev/sda - will list all partitions for disk sda
Alternatively, you can use parted, like this:
parted - once inside the parted shell, type:
print all
In order to list the partitions in a single device, once inside the parted shell, simply type:
parted /dev/sdb
or while inside the parted shell:
select /dev/sdb
Note, that you could run the commands outside the parted command shell, like this: parted -l
Create Partitions:
First we'll use fdisk, note that this is for a blank disk, if the disk already contains partitions then there will be limitations, e.g. if you already have 4 primary partitions you'll only be able to create an extended partition.
Now, let's turn to parted.
Using parted only, and assuming that the disk is 8 GB and has a 1 GB primary partition:
Delete partitions:
For fdisk.
This is relatively simple for fdisk.
You can do parted /dev/sdb 5 set lvm on, to set the lvm label on, but I don't know how to change the partition type to say VMWare VMFS.
List Partitions:
fdisk -l - will provide a list of partitions for all devices in the system
fdisk -l /dev/sda - will list all partitions for disk sda
Alternatively, you can use parted, like this:
parted - once inside the parted shell, type:
print all
In order to list the partitions in a single device, once inside the parted shell, simply type:
parted /dev/sdb
or while inside the parted shell:
select /dev/sdb
Note, that you could run the commands outside the parted command shell, like this: parted -l
Create Partitions:
First we'll use fdisk, note that this is for a blank disk, if the disk already contains partitions then there will be limitations, e.g. if you already have 4 primary partitions you'll only be able to create an extended partition.
- Start fdisk (note that you can type m for help) - fdisk /dev/sdb or fdisk -u /dev/sdb for sizes in sectors instead of cylinders
- Type n and you'll get the following options
- Type p
- Type 1, to make this the first partition
- The next option is where to start your partition, I normally accept the default, so I hit Enter
- The last option is where to end your partition. If you want just one partition accept the default, otherwise just select your partition size, e.g. say you want a 1 GB partition, you need type +1G
- type w, to write your changes to the partition table and exit fdisk.
Command action
e extended
p primary partition (1-4)
Now, let's turn to parted.
- Start parted (note that you can type help for help)- parted /dev/sdb
- Type makepart
- You'll get a choice of primary or extended, type primary
- Select the file type, e.g. ext4
- Select the start for the partition, note that unlike fdisk, you have to type something here, e.g. 1 for the partition to start at the beginning of the disk
- Select the end of the partition
- You might get a warning that the partition is not best aligned for performance, if you set the start at 0.
- Exit parted.
- Alternatively, you can just type parted /dev/sdb primary ext4 1 1000M from the command shell
Using parted only, and assuming that the disk is 8 GB and has a 1 GB primary partition:
- First make an extended partition - parted /dev/sdb mkpart extended 1000M 8000M
- Then make a logical partition - parted /dev/sdb mkpart logical 1001M 4000M
- output from: parted /dev/sdb print
Model: VMware Virtual disk (scsi)Note how the logical partition has a number of 5
Disk /dev/sdb: 8590MB
Sector size (logical/physical): 512B/512B
Partition Table: msdos
Number Start End Size Type File system Flags
1 1049kB 1000MB 999MB primary ext4
2 1000MB 8000MB 6999MB extended lba
5 1001MB 4000MB 2999MB logical
Delete partitions:
For fdisk.
- fdisk /dev/sdb
- Type d
- Type the number of the partition you want to delete
- Type w
- parted /dev/sdb
- rm n - where n is the number of the partition you want to delete.
- Alternatively, parted /dev/sdb rm n - where n is the number of the partition you want to delete.
This is relatively simple for fdisk.
- fdisk /dev/sdb
- Type t
- Type the partition number you want to use
- If you know the code, then type it, otherwise type L to get a list of partition codes
- Let's say we want to make it a swap partition, so type 82
- Type w
You can do parted /dev/sdb 5 set lvm on, to set the lvm label on, but I don't know how to change the partition type to say VMWare VMFS.
Friday, 3 June 2011
Start, stop and check the status of network services
Another relatively simple objective.
Start:
service servicename start
/etc/init.d/servicename start
Stop:
service servicename stop
/etc/init.d/servicename stop
Check Status
service servicename status
/etc/init.d/servicename status
Some services will have different commands available, just type service servicename to see them, e.g.
Start:
service servicename start
/etc/init.d/servicename start
Stop:
service servicename stop
/etc/init.d/servicename stop
Check Status
service servicename status
/etc/init.d/servicename status
Some services will have different commands available, just type service servicename to see them, e.g.
service sshd
Usage: /etc/init.d/sshd {start|stop|restart|reload|force-reload|condrestart|try-restart|status}
service httpd
Usage: httpd {start|stop|restart|condrestart|try-restart|force-reload|reload|status|fullstatus|graceful|help|configtest}
Start and stop virtual machines
A short and sweet objective this one:
Start Virtual Machines:
virsh start domain
Stop Virtual Machines:
virsh shutdown domain - This initiates a shutdown, so it may take a while for the machine to go down.
virsh destroy domain - This is equivalent to disconnecting the electricity supply from the server and thus it is immediate.
Start Virtual Machines:
virsh start domain
Stop Virtual Machines:
virsh shutdown domain - This initiates a shutdown, so it may take a while for the machine to go down.
virsh destroy domain - This is equivalent to disconnecting the electricity supply from the server and thus it is immediate.
Subscribe to:
Posts (Atom)