Friday 25 May 2012

SSH Single Sign On (SSO) for Ubuntu 12.04 using a Windows 2008 R2 / 8 Server Beta AD domain

In my previous post I discussed how to join a Ubuntu 12.04 server to a Windows AD domain (so far I've tried it for both windows 2008 R2 and Windows 8 Server Beta AD domains)
 
In this post I discuss how to get Kerberos based single sign on working. I have tested this method with an openSSH client from Linux and with Putty from Windows.
  1. Install auth-client-config an kerberos libraries for PAM:
    sudo apt-get install auth-client-config libpam-krb5
  2. Configure PAM for Keberos authentication:
    sudo auth-client-config -t pam-password -p kerberos_example
That is it.

It is very important that name resolution is working correctly as you could get issues if it doesn't work properly, thus an up to date DNS server is crucial.

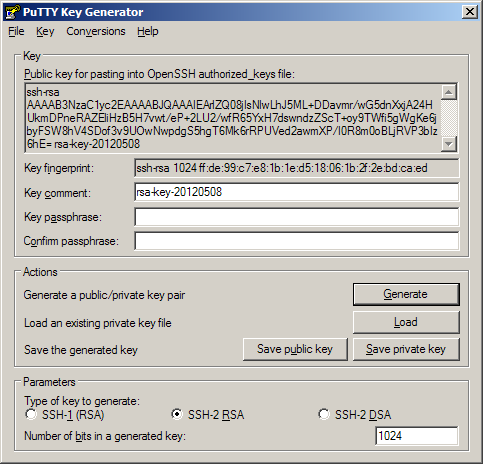
In order to test SSO from Putty, you need to ensure that you don't connect via IP address and that you set the auto-login username to a valid domain user, see below:


In order to test SSO from another Linux box do the following steps (note that depending on your distro you might have to install some packages):
  1. Get Kerberos ticket:
    kinit domainuser@TEST.ORG
  2. Login:
    ssh servername -l 'test\domainuser'
If you hit any problems, the simplest way to trouble shoot is to open a debug ssh daemon, which you can do like this (you can add a couple more ds for extra debug info but I think debug1 is all you need):
sudo /usr/sbin/sshd -p 31415 -d
You'll need to allow traffic on port 31415 or the port you choose, which you can easily do by stopping iptables. Clearly this should only be done in servers that are not internet facing. If the server is internet facing then just open port 31415, e.g:
sudo iptables -I INPUT -p tcp --dport 31415 -j ACCEPT
You can connect to this server with:
ssh servername -p 31415 -v
This should tell you what the problem is, e.g:
debug1: Unspecified GSS failure.  Minor code may provide more information
Key table entry not found
This was actually caused by a name resolution problem.

Saturday 19 May 2012

Join Ubuntu 12.04 (Precise Pangolin) server to a Windows 2008 R2/ 8 Server Beta Active Directory domain

In a previous post, I showed how to join a CentOS/RHEL 6.x server to a Windows 8 Server Beta Active Directory domain using a rather laborious method. In this post I will show you how to join a a Windows 8 Server Beta Active Directory domain using a far simpler way, by using Likewise Open. I've not tried using this method for CentOS/RHEL 6.x but Likewise Open is supported, so stay tuned.

In theory, this method should work for Windows 2003/2008 (R2) domains, but I've only tried it for  Windows 2008 R2 domain and Windows 8 Server Beta.

I had already set up the domain and DNS servers from my previous post, so I won't dwell on this, all I will say is that ensure that name resolution works from the Ubuntu server, e.g. make sure that at least you can ping the DC by hostname. An example /etc/resolv.conf file is shown below for a domain called test.org and DNS server with ip address (10.168.20.93), this should be set up automatically from your DHCP server, if not you'll need to edit /etc/networking/interfaces (note that the options are different to those in /etc/resolv.conf, see man page for resolvconf):
search test.org
nameserver 10.168.20.93
Install Likewise Open:
sudo apt-get install likewise-open5
You can now join the domain with this command (where test.org is the domain and Administrator is an account with Admin access to the domain):
sudo domainjoin-cli join test.org Administrator
Since I'm running a default server version of Ubuntu with no GUI, there is no need to reboot the server to be able to login to the server with domain accounts.

I've not managed to get this command to add an entry for the server to the DNS server so I had to issue this command:
sudo lw-update-dns
Finally, in order to allow domain users to use sudo, you can add this line to the /etc/sudoers file (It might be more appropriate to restrict this to a domain admins or a custom group):
%test\\domain^users ALL=(ALL) ALL
In order to login remember that you will need to use a valid username of this form domain\username rather than simply using the username as with the labour intensive way for CentOS/RHEL that I have discussed in the past.

Another upside of using Likewise Open is that users don't need to have their Unix attributes set, which I guess means that it's probably not necessary to install the Identity Management for UNIX components on the domain controller.

See this post for details on how to set up SSH single sign-on for Ubuntu 12.04.

Tuesday 15 May 2012

SSH Single Sign On for CentOS 6.2 or RHEL 6.0 using a Windows 8 Server Beta AD domain

In my previous post, I discussed how to join a CentOS 6.2 server to a Windows 8 Server Beta AD domain and in this post I discuss how to get Kerberos based single sign on working. I have tested this method with an openSSH client from Linux and with Putty from windows.

If testing from Linux, you will need at least two Linux servers that have joined the AD domain as explained in my previous post or one that has joined the domain and another with the ability to get a kerberos ticket from the DC.
If testing with Putty, all that is needed is to add a valid username in the Auto-login username field which can be found in Connection | Data. By valid, I mean a domain user with its Unix attributes set.
  1. From the Windows domain controller run the following command, which will create spns and upns. Note that you will need to run it as Administrator. I have also run this command for a fully qualified domain name instead of the hostname (i.e. host/pms3.sma.org) without any notable difference.
    ktpass.exe -princ host/pms3@SMA.ORG -mapuser SMA\pms3$ -pass Passw0rd123 -ptype KRB5_NT_PRINCIPAL -crypto All -out c:\pms3.keytab
  2. Copy pms3.keytab to your linux box, I simply mounted the c drive of the DC on the linux box, but this might not be available to you, see this post for instructions.
  3. If your server doesn't have a keytab file (/etc/krb5.keytab), then you can just move pms3.keytab to /etc/krb5.keytab otherwise you will need to merge it, which you can do with the ktutil tool, see this link for instructions.
  4. Restart the OpenSSH daemon:
    service sshd restart
  5. Configure the OpensSSH client. This will limit SSO to hosts in the domain:
  6. Host *.sma.org
    GSSAPIAuthentication yes
    GSSAPIDelegateCredentials yes
  7. Repeat steps 1 to 5 for the second server if needed.
  8. Login to first server with a domain account that has linux attributes set.
  9. Ensure that a Kerberos ticket has been issued: 
  10. klist
    Ticket cache: FILE:/tmp/krb5cc_0
    Default principal: atest@SMA.ORG

    Valid starting     Expires            Service principal
    05/15/12 15:25:45  05/16/12 01:23:44  krbtgt/SMA.ORG@SMA.ORG
            renew until 05/22/12 15:25:45
  11. Open secure shell on second server, which will log you without a prompt for credentials
    ssh pms3.sma.org
It is very important that name resolution is working correctly as you could get issues if it doesn't work properly, thus an up to date DNS server is quite useful. If you can't  update your DNS server make sure that your hosts files are up to date with all the server names involved.

If you hit any problems, the simplest way to trouble shoot is to open a debug ssh daemon, which you can do like this (you can add a couple more ds for extra debug info but I think debug1 is all you need):
/usr/sbin/sshd -p 31415 -d
You'll need to allow traffic on port 31415 or the port you choose, which you can easily do by stopping iptables. Clearly this should only be done in servers that are not internet facing. If the server is internet facing then just open port 31415, e.g:
iptables -I INPUT -p tcp --dport 31415 -j ACCEPT
You can connect to this server with:
ssh servername -p 31415 -v
This should tell you what the problem is, e.g:
debug1: Unspecified GSS failure.  Minor code may provide more information
Key table entry not found
This was actually caused by a name resolution problem.

Monday 14 May 2012

Join CentOS 6.2 server to a Windows 8 Server Beta Active Directory domain

I've been using Windows 8 Server Beta for a bit (since VMware got their act together and sorted support for it in ESXi) and one thing I wanted to investigate was integration with Linux, in particular, using Windows 8 Beta Server as an Active Directory domain controller for Linux servers.

I will not discuss how to promote a Windows 8 server Beta to become a DC as it's a fairly straight forward process. I will say that it took me a while to work out that it is no longer possible to install the Identity Management for UNIX role through the UI, I thought I must be missing something because for the life of me I could not see it, because it wasn't there :)

The good news is that it can done from PowerShell. Thus I ran a PowerShell console as an Administrator and ran the following commands:
  1. Dism.exe /online /enable-feature /featurename:adminui /all  /NoRestart
  2. Dism.exe /online /enable-feature /featurename:nis /all /NoRestart
  3. Dism.exe /online /enable-feature /featurename:psync /all
Where the first command installs the administration tools for Identity Management for UNIX, the second installs Server for NIS and the third installs Password Synchronization. Ensure that you reboot the DC server after running the third command.

Once the DC server had been rebooted I added a group, LinuxTest and an account, lb, to act as the binding account and set their Unix Attributes as can be seen below (if you add the account and there is no "unix" group it'll complain, although you can ignore the message):


With the domain controller prepared I turned to the CentOS server, here are the steps needed to join the domain:
  1. Ensure that name resolution is working. At the very least you should be able to ping your domain controller, in my case win8pdc.dev.com. If you can't, have a look at your /etc/resolv.conf file in the first instance. Sample file:
    search sma.org test.com
    nameserver 10.168.20.93
  2. Ensure that your hosts file contains an entry with the ip address of the server, something like this:
    10.168.20.99 pms3 pms3.sma.org
  3. Depending on your installation type, you might have to install several of the packages below (It looks like I went for a base install only):
    yum install pam_krb5 pam_ldap nss-pam-ldapd samba policycoreutils-python -y
  4. Run authconfig-tui. Make sure that Kerberos realm is in capitals (I'm re-using the screenshots from previous posts):


  5.  Alternatively, the following command could be used (change parameters as needed):
    authconfig --enablemd5 --enableshadow --enableldap --enableldapauth --enablekrb5 --ldapserver='win8pdc.sma.org' --disablelocauthorize --ldapbasedn='dc=sma,dc=org' --krb5realm='SMA.ORG' --krb5adminserver='win8pdc.sma.org' --krb5kdc='win8pdc.sma.org' --update
  6. Ensure that Name Service Switch is configured for ldap authentication. In essence, check that /etc/nsswitch.conf has the following values:
  7. passwd:     files ldap
    shadow:     files ldap
    group:      files ldap
  8. Edit the local LDAP name service daemon configuration (/etc/nslcd.conf). A bind account to the Active Directory is needed, so create that account now (I have created binding in the Users OU). The mappings (for Active Directory) need to be modified. Below is a list of changes to /etc/nslcd.conf. In essence uncomment the relevant parts:
  9. binddn cn=lb, cn=Users,dc=dev,dc=com
    bindpw mypass 
    #The Default search scope
    scope sub 
    #Customize certain database lookups
    base   group  dc=dev,dc=com
    base   passwd dc=dev,dc=com
    base   shadow dc=dev,dc=com
    # Mappings for Active Directory
    pagesize 1000
    referrals off
    filter passwd (&(objectClass=user)(!(objectClass=computer))(uidNumber=*)(unixHomeDirectory=*))
    map    passwd uid              sAMAccountName
    map    passwd homeDirectory    unixHomeDirectory
    map    passwd gecos            displayName
    filter shadow (&(objectClass=user)(!(objectClass=computer))(uidNumber=*)(unixHomeDirectory=*))
    map    shadow uid              sAMAccountName
    map    shadow shadowLastChange pwdLastSet
    map    shadow userPassword     unixUserPassword
    filter group  (objectClass=group)
    map    group  uniqueMember     member
  10. Change permissions on /etc/nslcd.conf file so that it is only readable by root:
    chmod 600 /etc/nslcd.conf
  11. Restart the local LDAP name service daemon:
    service nslcd restart
  12. Ensure that the local LDAP name service daemon (nslcd) is set to start with the server:
    chkconfig nslcd on
  13. Edit /etc/samba/smb.conf. Make sure that there is only a security directive active. Comment out all others.
  14. Network Related Options
    workgroup =dev
    Domain members options
    security = ads
    realm = DEV.COM
    password server = win8pdc.dev.com
  15. Ensure that iptables lets traffic through on port 389:
  16. iptables –I INPUT –p tcp --dport ldap –j ACCEPT; service iptables save
  17. Run the following command to join the domain:
  18. net ads join –U domainadmin
  19. Ensure that the DNS Zone is configured to accept secure and nonsecure dynamic updates.
  20. At this point you have successfully joined to the AD domain, you can test this by getting a list of users or group. You should get back the users and/or groups that have Unix attributes, at least the binding account and a group if you created it. You can also check the Computers group in the Active Directory Users and Computers console.
    getent passwd
    getent group
  21. In order to create a user's home directory on first login add this directive to /etc/pam.d/sshd. I only log on using ssh. If you are logging in at the box, rather than remotely, you need to modify /etc/pam.d/logon too, I believe. Note that this will not work if SELinux is on.
    session required pam_mkhomedir.so skel=/etc/skel umask=0022
  22. Allow polyinstatiation in SELinux settings:
     setsebool -P allow_polyinstantiation 1
  23. Temporarily set SELinux to permissive:
  24. setenforce 0
  25. If you login with a domain user (ssh lb@pms1, where pms1 is the server that has just joined the domain), the directory will be created, but you will also have a record of what would've gone wrong on /var/log/audit/audit.conf had SElinux been on, which in my case is this:
  26. type=AVC msg=audit(1329063091.971:160): avc:  denied  { create } for  pid=5510 comm="mkhomedir_helpe" name="binding" scontext=unconfined_u:system_r:sshd_t:s0-s0:c0.c1023 tcontext=unconfined_u:object_r:home_root_t:s0 tclass=dir type=AVC msg=audit(1329063091.973:161): avc:  denied  { create } for  pid=5510 comm="mkhomedir_helpe" name=".bashrc" scontext=unconfined_u:system_r:sshd_t:s0-s0:c0.c1023 tcontext=unconfined_u:object_r:home_root_t:s0 tclass=file type=AVC msg=audit(1329063091.973:161): avc:  denied  { write open } for  pid=5510 comm="mkhomedir_helpe" name=".bashrc" dev=dm-0 ino=263825 scontext=unconfined_u:system_r:sshd_t:s0-s0:c0.c1023 tcontext=unconfined_u:object_r:home_root_t:s0 tclass=file type=AVC msg=audit(1329063091.973:162): avc:  denied  { setattr } for  pid=5510 comm="mkhomedir_helpe" name=".bashrc" dev=dm-0 ino=263825 scontext=unconfined_u:system_r:sshd_t:s0-s0:c0.c1023 tcontext=unconfined_u:object_r:home_root_t:s0 tclass=file type=AVC msg=audit(1329063092.015:163): avc:  denied  { setattr } for  pid=5510 comm="mkhomedir_helpe" name="binding" dev=dm-0 ino=263284 scontext=unconfined_u:system_r:sshd_t:s0-s0:c0.c1023 tcontext=unconfined_u:object_r:home_root_t:s0 tclass=dir
  27. Create a SELinux policy module to allow the creation of home directories when the user first logs in:
    less /var/log/audit/audit.log  | grep denied > mkdir.log 
    audit2why < mkdir.log 
    audit2allow -M mkdir -i mkdir.log 
    semodule -i mkdir.pp
  28. Renable SELinux:
    setenforce 1
That is it, you now should be able to login with AD users, that have their Unix Attributes set, to this server with SELinux on, see this post to configure Kerberos based single sign-on.


Saturday 12 May 2012

HPCC results on an HPC (beowulf-style) cluster using CentOS 6.2

I have finally had a chance to carryout a few HPCC benchmark runs. As with the Linpack benchmarks I have compiled the HPCC benchmark with MKL and with ATLAS. 

Generally speaking MKL continues to perform better than ATLAS but clearly some of the benchmarks are hardly affected at all by the choice of library, which should not be surprising as some of the tests relate to latency and memory performance.

It is worth bearing in mind that this two node cluster does not have its own separate network switch and thus results will vary more than in a cluster with dedicated networking.

MKL ATLAS
HPL_Tflops=0.0689043 HPL_Tflops=0.025042
StarDGEMM_Gflops=6.98082 StarDGEMM_Gflops=1.95127
SingleDGEMM_Gflops=8.489 SingleDGEMM_Gflops=2.0767
PTRANS_GBs=0.285695 PTRANS_GBs=0.282756
MPIRandomAccess_LCG_GUPs=0.0107743 MPIRandomAccess_LCG_GUPs=0.0106545
MPIRandomAccess_GUPs=0.00980471 MPIRandomAccess_GUPs=0.011238
StarRandomAccess_LCG_GUPs=0.00292826 StarRandomAccess_LCG_GUPs=0.00305111
SingleRandomAccess_LCG_GUPs=0.0202582 SingleRandomAccess_LCG_GUPs=0.0209147
StarRandomAccess_GUPs=0.00294884 StarRandomAccess_GUPs=0.0030755
SingleRandomAccess_GUPs=0.0222603 SingleRandomAccess_GUPs=0.0219117
StarSTREAM_Copy=0.424375 StarSTREAM_Copy=0.49285
StarSTREAM_Scale=0.445834 StarSTREAM_Scale=0.52021
StarSTREAM_Add=0.596884 StarSTREAM_Add=0.629714
StarSTREAM_Triad=0.640154 StarSTREAM_Triad=0.684154
SingleSTREAM_Copy=3.0544 SingleSTREAM_Copy=3.06379
SingleSTREAM_Scale=3.03374 SingleSTREAM_Scale=3.03051
SingleSTREAM_Add=3.339 SingleSTREAM_Add=3.332
SingleSTREAM_Triad=3.32887 SingleSTREAM_Triad=3.31208
StarFFT_Gflops=0.242265 StarFFT_Gflops=0.233275
SingleFFT_Gflops=0.894628 SingleFFT_Gflops=0.93583
MPIFFT_Gflops=0.55462 MPIFFT_Gflops=0.402139
MaxPingPongLatency_usec=717.918 MaxPingPongLatency_usec=499.696
RandomlyOrderedRingLatency_usec=393.943 RandomlyOrderedRingLatency_usec=201.655
MinPingPongBandwidth_GBytes=0.0386536 MinPingPongBandwidth_GBytes=0.0312215
NaturallyOrderedRingBandwidth_GBytes=0.0129542 NaturallyOrderedRingBandwidth_GBytes=0.012228
RandomlyOrderedRingBandwidth_GBytes=0.021249 RandomlyOrderedRingBandwidth_GBytes=0.016799
MinPingPongLatency_usec=0.384119 MinPingPongLatency_usec=0.357628
AvgPingPongLatency_usec=332.504 AvgPingPongLatency_usec=291.221
MaxPingPongBandwidth_GBytes=3.87644 MaxPingPongBandwidth_GBytes=3.36689
AvgPingPongBandwidth_GBytes=0.839076 AvgPingPongBandwidth_GBytes=0.479826
NaturallyOrderedRingLatency_usec=585.89 NaturallyOrderedRingLatency_usec=293.112

Thursday 10 May 2012

Remove LUKS partition

I was trying to create a LUKS partition on a software raid array and I realized that I messed up (I used the wrong array), so tried to delete the LUKS partition but I wasn't as straight forward as I thought it would be so I decided to post here what I did.

The first thing to do is to find out the name of the LUKS device, this can be done with the blkid command (edited output below):
/dev/md5: UUID="d33fec62-6230-43b0-9ec5-7d5abeb1b918" TYPE="crypto_LUKS"
/dev/mapper/md5encrypted: UUID="fae9323a-d9a8-4deb-8c63-0d967c75091e" TYPE="ext4"
Note, that a LUKS device will only appear in blkid if it has been given a filesystem (i.e. formatted).

My LUKS device is called md5encrypted so I can get its status like this:
cryptsetup status md5encrypted  
/dev/mapper/md5encrypted is active.
type:  LUKS1
cipher:  aes-cbc-essiv:sha256
keysize: 256 bits
device:  /dev/md5
offset:  4096 sectors
size:    4188136 sectors
mode:    read/write
The first thing is to remove the encryption keys, which can be done by issuing the following command:
cryptsetup luksRemoveKey /dev/md5
Enter LUKS passphrase to be deleted:

WARNING!
========
This is the last keyslot. Device will become unusable after purging this key.

Are you sure? (Type uppercase yes): YES
Finally, the actual LUKS device can be removed with this command:
cryptsetup remove /dev/mapper/md5encrypted /dev/md5
At this point, you can format (give md5 a filesystem) again and there won't be any devices left hanging about. You might need to edit your /etc/fstab and /etc/crypttab files if your LUKS device was configured to mount on boot.

Wednesday 9 May 2012

Using Putty to configure passphraseless SSH login to CentOS server


A couple of weeks ago, I re-imaged my laptop again and for some reason I had neglected to backup all the private-public key pairs that I use to logon to our dev servers. Since I use a single server almost all of the time and then ssh from it to other servers, it hasn’t been too much hassle, but today I’ve had enough, so armed with puttygen, which can be downloaded from the putty downloads page here, I resolved to restore my easy access to the dev severs.

A word of caution, not using a passphrase is a security risk and should only be used in private networks without access to the outside world.

So without further ado here are the instructions:
  1. Generate public private key pair with Puttygen:
  2.  
  3. Save private key to a file:
  4.  
  5. Copy public key from window and paste to your user’s .ssh/authorised_keys file (e.g. if your user is called mike you can find this file /home/mike/.ssh/authorised_keys. If the file does not exist create it and give it appropriate permissions [RW for user only]):
     
  6. You can now configure putty. Ensure that the Auto-login name username is correct for your user:

  7. Select the private key saved in step 2:
  8.  
  9. It's always a good idea to save the session, so you don't have to type the settings every time:
  10.  
Enjoy!

Tuesday 8 May 2012

Use PowerShell to test TCP and UDP connectivity (Open TCP/UDP Socket)

A while ago some security expert, and I use expert in the loosest sense of the word, raised the alarm about telnet. Yes, that old trusted telnet used by all to test connectivity using TCP sockets and used by none, I hope, to connect to a remote shell. If you are reading this and still use telnet to connect to a remote shell, let me introduce you to openSSH.

Telnet, we were told was not secure, which is true, but it is also true that not a single server in the estate had a telnet server running. All (windows) servers could use a telnet client, but it's not very useful if the server is not there, but no matter a new GPO was created to prevent the use of the telnet client.

Today, we needed to test connectivity to a server as a batch had failed. We were being told that it was a network issue and thus we needed to be able to establish that this was not the case, but telnet was not available, thank you security expert, which raised a bit of an issue. Enter PowerShell:
 $socket = New-Object net.sockets.tcpclient("hostname",portnumber)
That is it. If the socket can be opened this will take a very short time, if it can't then, it will take a while to time out. Note that the IP address can be used instead of the hostname, but the method still takes a string, so it must be in quotes:
PS C:\> $socket =New-Object net.sockets.tcpclient("74.125.132.105",80)
PS C:\> $socket

Client              : System.Net.Sockets.Socket
Available           : 0
Connected           : True
ExclusiveAddressUse : False
ReceiveBufferSize   : 8192
SendBufferSize      : 64512
ReceiveTimeout      : 0
SendTimeout         : 0
LingerState         : System.Net.Sockets.LingerOption
NoDelay             : False
Note, that there is a udpclient on the System.Net.Sockets namespace that can be used for testing udp connectivity.

For completeness, this is the result of trying to connect on port 8210:
PS C:\> $socket =New-Object net.sockets.tcpclient("74.125.132.105",8210)
New-Object : Exception calling ".ctor" with "2" argument(s): "A connection attempt failed because the connected party did not properly respond after a period of time, or established connection failed because connected host has failed to respond 74.125.132.105:8210"
At line:1 char:20
+ $socket =New-Object <<<<  net.sockets.tcpclient("74.125.132.105",8210)
 + CategoryInfo          : InvalidOperation: (:) [New-Object], MethodInvocationException
 +FullyQualifiedErrorId : ConstructorInvokedThrowException,Microsoft.PowerShell.Commands.NewObjectCommand

PS C:\> $socket

Client              : System.Net.Sockets.Socket
Available           : 0
Ttl                 : 32
DontFragment        : False
MulticastLoopback   : True
EnableBroadcast     : False
ExclusiveAddressUse : False

Monday 7 May 2012

Run HPCC on an HPC (beowulf-style) cluster using CentOS 6.2

The HPC Challenge benchmark or HPCC, expands on HPL by adding six extra benchmarks to provide a more complete, yet still fairly synthetic, picture of a cluster's performance.

I managed to build HPCC without issues using the Atlas library, once I read the instructions, but struggled significantly with MKL until it was pointed out to me the existence of this tool that can be used to generate the appropriate link lines and compiler flags.

I shall concentrate on the install of HPCC using MKL as the results from running various HPL tests, see this post, showed that performance is significantly better than using the Atlas library. MKL is not free, but it's probably worth its price given the performance boost in HPL. We shall find out whether the same is true for HPCC.
  1. Install the Intel MKL library, which can be downloaded from here. Then installation is fairly straight forward. Unpack the tarball, run install.sh and follow the instructions.
  2. Download HPCC from here and extract it to ../hpcc-1.4.1
  3. Create Make.intel file on ../hpcc-1.4.1./hpl . See relevant content below:  

  4. # ----------------------------------------------------------------------
    # - HPL Directory Structure / HPL library ------------------------------
    # ----------------------------------------------------------------------
    #
    TOPdir       = ../../..
    INCdir       = $(TOPdir)/include
    BINdir       = $(TOPdir)/bin/$(ARCH)
    LIBdir       = $(TOPdir)/lib/$(ARCH)
    #
    HPLlib       = $(LIBdir)/libhpl.a
    #
    # ----------------------------------------------------------------------
    # - Message Passing library (MPI) --------------------------------------
    # ----------------------------------------------------------------------
    #
    #MPdir        = /usr/bin/mpi
    #MPinc        = -I$(MPdir)/include
    #MPlib        = /usr/lib64/mpich2/lib/libmpich.a
    #
    # ----------------------------------------------------------------------
    # - Linear Algebra library (BLAS or VSIPL) -----------------------------
    # ----------------------------------------------------------------------
    #
    LAdir        = /opt/intel/mkl/lib/intel64
    LAinc        = /opt/intel/mkl/include

    LAlib =  -Wl,--start-group  $(LAdir)/libmkl_cdft_core.a $(LAdir)/libmkl_intel_lp64.a $(LAdir)/libmkl_sequential.a $(LAdir)/libmkl_core.a $(LAdir)/libmkl_blacs_intelmpi_lp64.a -Wl,--end-group -lpthread -lm

    # ----------------------------------------------------------------------
    # - F77 / C interface --------------------------------------------------
    # ----------------------------------------------------------------------
    #
    F2CDEFS      =
    #
    # ----------------------------------------------------------------------
    # - HPL includes / libraries / specifics -------------------------------
    # ----------------------------------------------------------------------
    #
    HPL_INCLUDES = -I$(INCdir) -I$(INCdir)/$(ARCH) -I$(LAinc)
    HPL_LIBS     = $(HPLlib) $(LAlib) $(MPlib)
    #
    # - Compile time options -----------------------------------------------
    #
    HPL_OPTS     = -DHPL_CALL_CBLAS
    #
    # ----------------------------------------------------------------------
    #
    HPL_DEFS     = $(F2CDEFS) $(HPL_OPTS) $(HPL_INCLUDES)
    #
    # ----------------------------------------------------------------------
    # - Compilers / linkers - Optimization flags ---------------------------
    # ----------------------------------------------------------------------
    #
    CC           = /usr/bin/mpicc
    CCNOOPT      = $(HPL_DEFS)
    CCFLAGS      = $(HPL_DEFS) -fomit-frame-pointer -O3 -funroll-loops -DMKL_ILP64 -m64
    #
    # On some platforms,  it is necessary  to use the Fortran linker to find
    # the Fortran internals used in the BLAS library.
    #
    LINKER       = /usr/bin/mpicc
    LINKFLAGS    = $(CCFLAGS)

  5. From ../hpcc-1.4.1 run make arch=intel to build HPCC.
Before you can run hpcc, an input file needs to be created. The easiest is to rename the existing _hpccinf.txt and then edit it. If you are familiar with HPL, then you'll be familiar with this file:

mv _hpccinf.txt hpccinf.txt
 
You can now run hpcc with:

mpiexec.hydra -n 4 ./hpcc

Results can be found here.

Tuesday 1 May 2012

Linpack (HPL) results on an HPC (beowulf-style) cluster using CentOS 6.2

In my previous post, I described how to install and run Linpack (HPL) on a two node HPC (Beowulf-style) cluster running CentOS 6.2, in this post I will discuss some of the results from various Linpack runs that I have conducted in the past few days.

The first thing to note is that the HPL.dat file that is available post install is simply useless to extract any kind of meaningful performance numbers, so the file needs to be edited, but how? There is an online tool that will generate an HPL.dat file and this is what I have been using to provide me with some guidance of what to use. I have changed the number of equations, to generate a nice graph.

The first two tests that I ran, were ran using the configuration described in my previous post, I then recompiled Linpack with MKL and re-run the tests, see figure 1 below for results.

Figure 1 - WR11C2R4 test for various problem sizes with fixed block size of 128.
The highest value for Atlas, is 25.13 GFlops, whereas the highest result for MKL is 60.03 GFlops, which means that using MKL more than doubles performance. I was expecting a good increase in performance with MKL but a more than doubling of performance is extremely impressive, it's a shame that MKL is not free, but in a real cluster it's probably worth the cost.

The tool suggests that it would be possible to run a test for a problem size of ~41000, however, it seems that performance tanks after a problem size of 30000 for Atlas. MKL shows better performance, but still performance does go down. Execution time for a problem size of 35000 was ~ 7000 seconds for Atlas, I did not try with MKL for such a large problem size. The reason is probably due to memory swapping as there is higher memory usage than expect, which is something that I will need to investigate. 

The second test I ran was intended to investigate the effect of block size. I fixed the problem size (N) and varied the block size (NB), see figure 2 below.

Figure 2 - Influence of Block Size on performance
The gains from increased block size appear to top out at a block size of 168 for a problem size of 20000 and 256 for a problem size of 25000. I did run with a block size of 268, but performance was actually reduced (60.1 GFlops). The netlib guidelines, recommend a block size of less than 256, so it shouldn't be surprising that a bigger block size yields worse performance. Block size is balancing act between data distribution and computational granularity.

It is interesting to note that the maximum performance (68.7 GFlops) was achieved for a problem size of 30000 and a block size of 192, although to be fair, the difference between a block size of 192 and 256 is only 4%.

Also interesting is how much the data varies for a problem size of 30000, all I can say is that the servers in the cluster don't have a separate network and thus performance is unlikely to ever be constant.

The efficiency of the cluster is actually only 46%, which is appalling, but given the various limitations in the system it's perhaps not that surprising.

In my next post, I discuss how to install HPCC, which is more comprehensive benchmark tool.