Amazon allows users to test their cloud for free for the first year, there are of course quite a few limitations, perhaps the most important of which is that you can only use the micro instance, which has 613 MB of RAM, I guess the hypervisor memory footprint must account for the ~150 MB that would make it up to 768 MB of memory usage.
At any rate, I wanted to find out how well these machines would perform on Linpack, so I created a very small, 4 node, cluster using my own instructions and set it to work.
All I can say is that the performance is appalling, the best test was 0.72 Gflops, see below.
It took over an hour to run a problem size of 15000, but unfortunately it crashed before it finished, even so I can't image the performance improving by much. These instances are unlikely to have even a single core all to themselves and network traffic was within Amazon's network rather than dedicated networks.
This is hardly surprising as Amazon has cluster specific instances available, still I'm pretty disappointed at the results.
I might try again with MKL to see if the performance improves somewhat.
================================================================================
T/V N NB P Q Time Gflops
--------------------------------------------------------------------------------
WR11C2R4 1000 128 2 2 0.93 7.223e-01
--------------------------------------------------------------------------------
||Ax-b||_oo/(eps*(||A||_oo*||x||_oo+||b||_oo)*N)= 0.0064465 ...... PASSED
================================================================================
T/V N NB P Q Time Gflops
--------------------------------------------------------------------------------
WR11C2R4 5000 128 2 2 254.06 3.282e-01
--------------------------------------------------------------------------------
||Ax-b||_oo/(eps*(||A||_oo*||x||_oo+||b||_oo)*N)= 0.0061108 ...... PASSED
================================================================================
T/V N NB P Q Time Gflops
--------------------------------------------------------------------------------
WR11C2R4 10000 128 2 2 965.92 6.903e-01
--------------------------------------------------------------------------------
||Ax-b||_oo/(eps*(||A||_oo*||x||_oo+||b||_oo)*N)= 0.0060791 ...... PASSED
================================================================================
Finished 3 tests with the following results:
3 tests completed and passed residual checks,
0 tests completed and failed residual checks,
0 tests skipped because of illegal input values.
--------------------------------------------------------------------------------
Showing posts with label Amazon Linux AMI. Show all posts
Showing posts with label Amazon Linux AMI. Show all posts
Sunday, 3 March 2013

Thursday, 7 February 2013
Setting up a VPN server (PPTP) on Amazon Linux AMI
I finally decided to give Amazon EC2 a go a few days ago, thinking to myself that it would be a nice way of keeping my Linux skills afresh, long term followers of this blog (hello mum), would have noticed the recent dearth of Linux posts in this blog.
Amazon Linux AMI is based on RHEL, so the instructions below work for RHEL 6 ( I didn't realize that RHEL images were not included in the free tier, D'Oh), so without further ado this what you need to do:
I'm assuming that you have already launched an AMI instance.

Do note that protocol ID 47 also needs to be open, probably something like this is needed (not tested)
Amazon Linux AMI is based on RHEL, so the instructions below work for RHEL 6 ( I didn't realize that RHEL images were not included in the free tier, D'Oh), so without further ado this what you need to do:
I'm assuming that you have already launched an AMI instance.
- Get the PPTP deamon from sourceforge and Install it
- Set Server IP address and Client IP Address ranges by editing /etc/pptpd.conf
- Add allowed users by editing /etc/ppp/chap-secrets
- Add DNS servers (I've used Google DNS servers) by editing /etc/ppp/options.pptpd
- Set up port forwarding (to allow connections to escape the server)
- Allow system to forward packets. Edit /etc/sysctl.conf
- Start VPN service
- Set VPN service to start with the system.
wget http://poptop.sourceforge.net/yum/stable/packages/pptpd-1.3.4-2.el6.x86_64.rpm
sudo yum -y install pptpd-1.3.4-2.el6.x86_64.rpm
localip 192.168.0.1
remoteip 192.168.0.234-238
myuser pptpd myuserpassword *
ms-dns 8.8.8.8
ms-dns 8.8.4.4
sudo iptables -t nat -A POSTROUTING -o eth0 -j MASQUERADE
sudo service iptables save
net.ipv4.ip_forward=1
sudo service pptpd start
sudo chkconfig pptpd on
Do note that protocol ID 47 also needs to be open, probably something like this is needed (not tested)
iptables -A INPUT -p 47 -j ACCEPT
The main problem with using amazon is that the IP address changes with every reboot, which means that you either look it up every time or you use some sort of DDNS.
There are free DDNS services but I've not used them and obviously looking it up is a bit of pain, I'm going to investigate whether this information can be obtained programmatically from the console and the VPN connection edited programmatically, so watch this space.
Alternatively, an elastic IP address could be used, which is free while the instance is powered on.
Alternatively, an elastic IP address could be used, which is free while the instance is powered on.
Monday, 4 February 2013
Multiple installations of Joomla in single server.
This has been asked multiple times, How do I host multiple installs of Joomla in a single server? in this post, actually only once, but I thought I would answer it properly here.
I am going to assume that you have followed my guide to install Joomla, here, which means that you already have a working instance of Joomla.
Note that while the original post was for CentOS 6.x, it also works fine for Amazon Linux AMI as long as you remember to sudo most commands and indeed RHEL 6. I've left sudo out of the commands to keep it more general.
- Extract downloaded package again:
unzip Joomla_2.5.1-Stable-Full_Package.zip
- Create New Joomla directory
- Move all files to home web directory:
mv /joomla/* /var/www/html/secondjoomla
- Create second Joomla User (note that these are two separate commands):
mysql -u root -p
CREATE USER 'SecondJoomlaUser'@'localhost' IDENTIFIED BY 'mypass'; - Create second Joomla Database:
mysqladmin -u root -p create SecondJoomla
- Provide appropriate privileges to the second Joomla User user (note that these are two separate commands):
mysql -u root -p
GRANT ALL PRIVILEGES ON SecondJoomla.*
TO SecondJoomlaUser@localhost IDENTIFIED BY 'mypass';
where:
'SecondJoomla' is the name of your database
'SecondJoomlaUser@localhost' is the userid of your webserver MySQL account
'mypass' is the password required to log in as the MySQL user - Apply privileges and exit:
flush privileges; \q
- Create empty configuration.php file and set permissions:
touch /var/www/html/secondjoomla/configuration.php
chmod 666 /var/www/html/secondjoomla/configuration.php - Set up Virtual Hosts in Apache. You will need to edit /etc/httpd/conf/httpd.conf. You can find a sample below. Ensure that the first directive has been uncommented.
- Ensure config syntax is ok and restart Apache.
- You can now start the Second Joomla install proper by navigating to:
http://www.example2.com
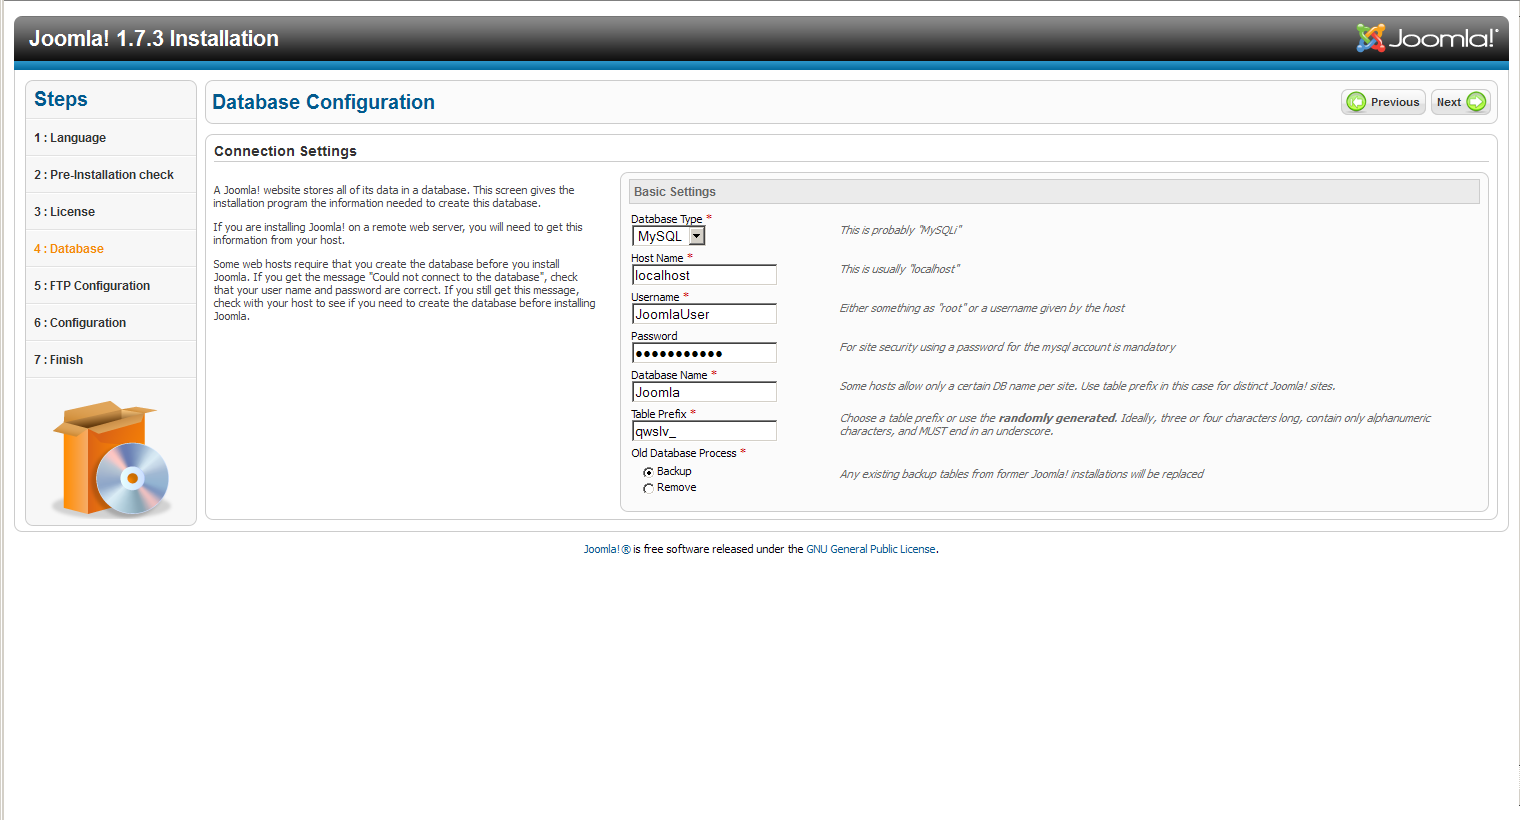
- On step 4 use the following settings:
- Ensure that you remove the installation directory
rm -rf /var/www/html/secondjoomla/installation/
- You can now go and administer your second site or view the sample sites if you chose to install the sample data. Enjoy!
mkdir /var/www/html/secondjoomla
NameVirtualHost *:80
<VirtualHost *:80>
ServerAdmin webmaster@example1.com
DocumentRoot /var/www/html
ServerName example1.com
ServerAlias www.example1.com
ErrorLog logs/example1.com-error_log
CustomLog logs/example1.com-access_log common
</VirtualHost>
<VirtualHost *:80>
ServerAdmin webmaster@example2.com
DocumentRoot /var/www/html/secondjoomla
ServerName example1.com
Serveralias www.example2.com
ErrorLog logs/example1.com-error_log
CustomLog logs/example1.com-access_log common
</VirtualHost>
apachectl -S
apachectl restart
Please note that in order to test this setup (two Joomla websites), the machine browsing to the joomla websites must be able to resolve example1.com and example2.com, or whatever domain names are being used.
Ordinarily this is done by a DNS server, but the above entries can be added to the hosts file. It is imperative that all devices accessing the website are able to resolve those names, otherwise the first website (example1) will be displayed.
Ordinarily this is done by a DNS server, but the above entries can be added to the hosts file. It is imperative that all devices accessing the website are able to resolve those names, otherwise the first website (example1) will be displayed.
Subscribe to:
Posts (Atom)