Wednesday, 6 June 2012

Install MS Dynamics CRM 2011 for Outlook using Service Center Configuration Manager 2012 - part 3

In the first post of this series, I described how to install SCCM 2012 without an internet connection and in the second post of the series, I described how to configure SCCM 2012. In this post, I finally describe how to actually install MS Dynamics CRM 2011 for Outlook using SCCM 2012.

This installation will simply make MS Dynamics CRM 2011 for Outlook available to users that have Outlook 2010 x64 installed in their machines, it will not install it nor configure it. This is what we have been asked to provide the customer with, for the time being at least.
  1. Create Administrative install of MS Dynamics CRM 2011 for Outlook (From <mediadrive>:\Client\amd64\):
    msiexec /a Client.msi targetdir=C:\CRM4OUT
  2. Navigate to Software Library | Overview | Application Management | Applications and hit Create Application. Follow the wizard to completion.


  3. Since Microsoft Dynamics CRM 2011 for Outlook needs to have Outlook 2010 x64 installed, you need to add a check for this. In order to check this you can check that the following registry key equals x64.
     HKEY_LOCAL_MACHINE\Software\Microsoft\Office\14.0\Outlook\Bitness
  4. Right Click Microsoft Dynamics CRM 5.0  for Outlook and select Properties. Select the Deployment Types tab and click Edit. Select the Requirements tab and then Add.


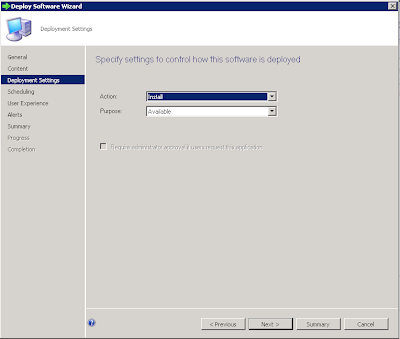
  5. From Software Library | Overview | Application Management | Applications, click Deploy to start the deployment process. If you've followed this series from the beginning choose the Device collection you created earlier and follow the wizard to completion.


  6. The deployment can be monitored from Monitoring | Overview | Deployments. Do have patience as it does seem to go very slowly, which is extremely frustrating. The first screenshot below shows how one computer has had MS Dynamics CRM 2011 for Outlook and the other (in the Device Group) does not meet requirements. In this case, because it does not have Outlook installed, see in the second screenshot, how the value is NULL.


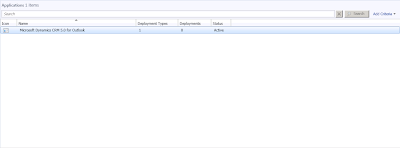
  7. On the Client side,  Software Center now displays Microsoft Dynamics CRM 5.0 for Outlook:
  1. Select Microsoft Dynamics CRM 5.0 for Outlook and press Install, which will trigger the download and install of Microsoft Dynamics CRM 2011 for Outlook.  


I think this solution is less than ideal, as it requires quite a bit of intervention from the users, but we are only providing what we have been asked for.

Tuesday, 5 June 2012

Install MS Dynamics CRM 2011 for Outlook using Service Center Configuration Manager 2012 - part 2

In my previous post, I described how to install SCCM 2012 and in this post I will discuss how to configure SCCM 2012. All these tasks are accomplished from the Configuration Manager Console. I am listing the tasks in the order that I have performed then, there is no need to do them in this order, though:

Install Application Catalog roles

Navigate to Administration | Overview | Site Configuration | Server and Site System Role. Right Click on the SCCM server and select Add System Roles. Follow the wizard and ensure that the following roles are selected on the role selection screen:

Application Catalog web service point
Application Catalog website point

Continue with the Wizard accepting the defaults.

Enable Discovery Method(s):

Navigate to Administration | Overview | Discovery Methods. Double Click on the method you want to use for discovery of AD objects and tick the Enable box. Depending on the method there will be different options to configure.
The screenshot below shows Active Directory System Discovery, with a filter to limit the discovery to computers within the SCCMTEST OU.


Once enabled, right click on the enabled discovery method and select Run Full Discovery Now.

You can check the results of the scan by navigating to Assests and Compliance | Overview | Devices:


I also created a restricted groups policy in AD to make the SCCM server a member of the local administrators group in all computers in the SCCMTEST OU, as this is needed for software installation.

Create a Boundary:

Navigate to Administration | Overview | Boundaries.  Press the Create Boundary button and follow the wizard. I suggest using an Active Directory site as this seems to be the most common configuration:


Create a Boundary Group:
 
Navigate to Administration | Overview | Boundaries.  Right Click on the Boundary created in the previous section and select Add Select Items | Add Selected Items to New Boundary Group
 

Extend Schema:

This is very straight forward, simply run this command from the installation disc as a user with the necessary permissions to modify Active Directory's Schema:
<mediadrive>:\SMSSETUP\BIN\X64\extadsch.exe
Add Device Collection:

This is not strictly needed but it makes it easier to ensure that all devices receive the correct software. Navigate to Assests and Compliance | Overview | Device Collections and click on Create Device Collections button and follow the wizard. I suggest that the All system collection is used as the limiting collection.

Install Client:

If you have been following this series, then all you need to do is right click on the Device or Device Collection and follow the wizard. Otherwise, ensure that you read the Before you begin page of the wizard and comply with the pre-requisites there.

    Monday, 4 June 2012

    Install MS Dynamics CRM 2011 for Outlook using Service Center Configuration Manager 2012 - part 1

    I've been looking at using Service Center Configuration Manager 2012 to install Microsoft Dynamics CRM 2011 for Outlook for the past few weeks as part of a project we're working on and I thought I would share my experiences here. 

    The first thing I have to say is that this is by far the most complex product from Microsoft I have ever used, perhaps I'm used to Microsoft software needing little if any configuration, this isn't one of them. There is nothing wrong this, but it's not very common with Microsoft products, at least with the ones I've used.

    Another point to mention, is that because our development/test environment does not have an internet connection and we are still running Windows XP on our work laptops, the tool to download the pre-requites would not work as it's a 64 bit tool, which meant that I had to download them from home.

    Hardware:

    In order to follow these instructions, you'll need to have two separate servers (2 GB of RAM, 30 GB of HDD space), running Windows 2008 R2, one for the database and another for SCCM 2012 itself and at least a Windows 7 machine to deploy software to, needless to say they can all be virtualized. 

    The instructions below are not meant to be comprehensive but rather a general guide that assumes some previous knowledge of Windows, SQL Server and Microsoft products in general.

    Database Server:

    SCCM 2012 is very particular regarding which versions of SQL server it can use and these instructions are meant for SQL Server 2008 R2 only. Different versions of SQL require different patching levels.

    These steps need to be carried out on the Database server.

    1. Install SQL 2008 R2. There are a few things that I'd like to comment on:

      • On the feature selection page, select the Database Engine Services and the Management Tools.
      • Use the default instance (If you use a named instance, ensure that you set it to use static ports. This can be done from SQL Server Configuration Manager | SQL Server Network Configuration | Protocols for InstanceName | TCP/IP)
      • On the Server Configuration page, ensure that you use the Network Service account for all services. This is NOT a best practice, but it makes life easier. If you use a domain account, ensure that you register SPNs for it.
      • On the Server Configuration  page (Collation tab), ensure that you set collation of the Database Engine to SQL_Latin1_General_CP1_CI_AS as per screenshot below:

    2. Install SP1 for SQL 2008 R2:
      Download it from here http://www.microsoft.com/en-us/download/details.aspx?id=26727
    3. Install CU6 for SQL 2008 R2 SP1 (For some reason this CU, which you are only supposed to use if affected by any of the issues that it solves, is needed for SCCM 2012):
      You can request the hotfix from here http://support.microsoft.com/hotfix/KBHotfix.aspx?kbnum=2679367&kbln=en-us 
    4. Add the SCCM server account to the Local Administrator group.
    5. Create an account in SQL Server for the SCCM server account and give it the sysadmin role.
    This concludes the database server preparation section.

    Service Center Configuration Manager Server:

    These steps need to be carried out on the SCCM server. Strictly speaking, step one does not need to be carried out from the SCCM server, in fact in our environment it can't be done.
    1. Download pre-requisites from a 64 bit Windows OS.
      <mediadrive>:\SMSSETUP\BIN\X64\setupdl.exe
    2. Install the following System Features (Ensure that you install Required Role Services and Features if prompted) :

      1. .Net Framework 3.5.1 (Ensure that WCF Activation is installed too)
      2. BITS
      3. Remote Differential Compression

    3. Install the following Web Server features (IIS should have been installed by 2.1)

      • Windows Authentication
      • IIS6 WMI Compatibility

    4. Install .Net Framework 4.0 (This is part of the pre-requisites downloaded in step 1, so there is no need to download it again)
    5. You can now run the installer:

    6. Give Full Control rights on the System Management (domain.com | System | System Management) container in AD to the SCCM server account.
    There were a couple of issues that I found during the various installation attempts:
    1. The first attempt required me to manually start the BITS services before they were picked up by the installer checks.
    2. On the second install I had to change the static ports twice for the second instance, for some reason it refused to connect on the first port (14330) I assigned.
    3. The collation was wrongly identified and I had to restart the installer to make the error go away.