In the first part of this series, I discussed how to set up the ESX Guests to enable Active-Active failover clustering. In the second part of this series, I discussed how to set up a Windows Failover Cluster in Windows 2008 R2. The third part in this series describes how to install the first SQL Server 2008 failover cluster, SQL2K8A of the Active-Active SQL Server 2008 failover cluster.
You need to create a couple of service accounts in your domain to run the SQL Server and associated services. If you are not going to use service SIDs then you will also need a couple of domain groups. I have decided to use service SIDS. This option is only available for Windows 2008 and thus I have only created two domain user accounts:
- SQLCluster2K8a.
- SQLCluster2K8b.
You can add this account to the local administrator group to allow you to administer the servers, but it is not necessary.
The rationale behind this decision, to use two service accounts, is: to prevent an account lock-out from taking both of your SQL failover clusters down. It is not a requirement and thus you can simply use a single account to run both SQL failover clusters, as indeed I have done for this demonstration (Talk about do as I say, not as I do).
In order to prevent potential issues compatibility issues it is necessary to slipstream SP1 into the installation media. You can check this link for details on how to do this. Please note, that it is not necessary to slipstream all architectures as the link suggests, you just need to do the architecture that you are using.
Run Setup.exe and from the Installation tab, select New SQL Server failover cluster installation, which will launch a wizard that will guide you through the installation process. The wizard will check the server for its suitability as a failover cluster and it will then install the setup support files. The installation wizard proper will run after this.
On the Setup Rules Support tab, I encountered a few warnings:
- Distributed Transaction Coordinator (MSDTC) Clustered
- Microsoft Cluster Service (MSCS) cluster verification warnings
- Microsoft .NET Application Security
- Network Binding order
Which were dealt with like this:
- I don’t think MS Dynamics CRM 2011 uses MSDTC, so I’m not too bothered about this warning, however, see this link for details of how to cluster the MSDTC service.
- I ran a cluster validation test and the warning went away.
- Guests I'm using don’t have access to the internet so this is to be expected.
- In theory, following this KB should have fixed the issue, alas the warning continues to appear and I'm not sure why. The binding order is definitely correct on both nodes.
See Figure 3.1 to see the selections I made on the Feature Selection tab:
 |
| Figure 3.1 Selected Features for first node of SQL2K8A failover cluster. |
You might already have the management tools installed somewhere else, but I've always found it useful to have them in the actual server.
- On the Instance Configuration tab: I set the SQL Server Network name and the instance name so that it matches the SQL Cluster DNS A Record, namely SQL2K8A.
- On the Cluster Disk Selection tab: make sure that you only select one of the Cluster Disks, you'll need the other for the second SQL failover cluster.
- On the Cluster Network Configuration tab: Deselect use DHCP and set the IP Address for SQL2K8A, 10.168.20.243 in this case.
- On the Database Engine Configuration tab, add the service account (SQLCluster2K8A) and your user.
Once the installation completes, you can check that it has successfully created a new cluster service (Resource group in Windows 2003 parlance) by running the Failover Cluster Manager, see figure 3.2 Do not try to failover this group yet, as it has not been installed on the passive node.
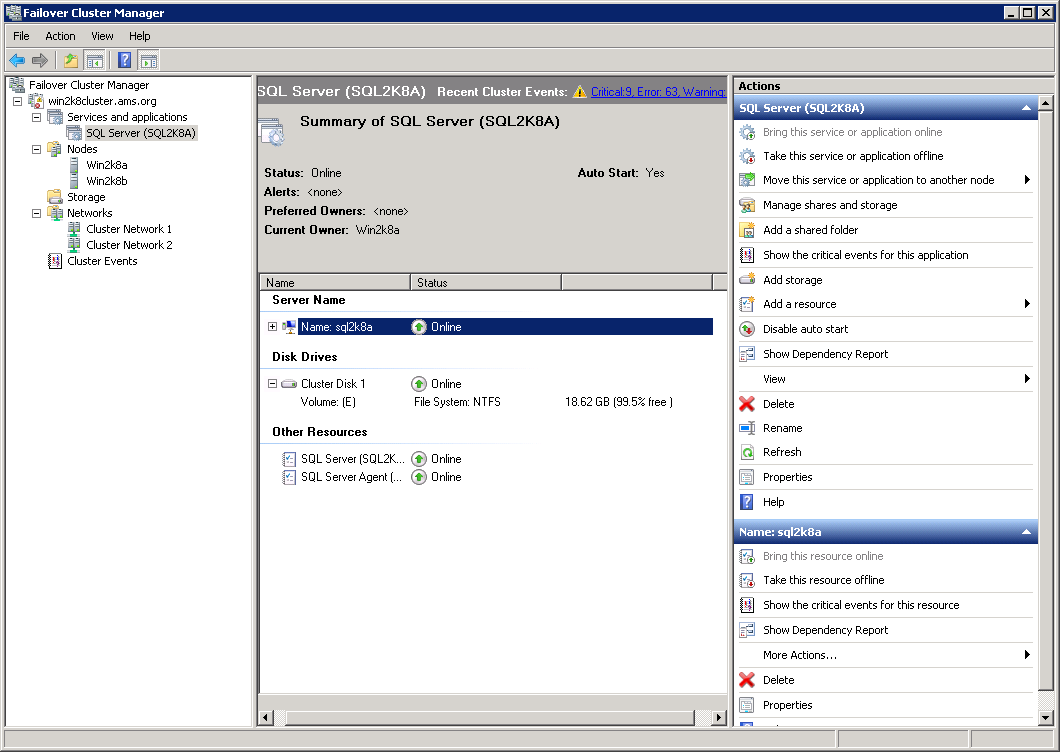 |
| Figure 3.2 Failover Cluster Manager displaying the components of the first SQL Server failover cluster (SQL2K8A). |
The procedure for installing the second node of the SQL Server failover cluster is fairly similar to installing the first node. Assuming that you have slipstreamed SP1 for this node you can start the installation by running Setup.exe and going through the wizard, however, rather than selecting New SQL Server failover cluster installation from the Installation tab, you need to select Add node to a SQL Server failover cluster. This will launch a wizard, that will run some checks and then it will launch another wizard that will install the setup support files before finally launching the Add a Failover Cluster Node wizard.
I encountered an error related to .NET Framework before even launching the first wizard, which did not occur in node 1. I’m not sure what the source of this error is, but since there is an easy workaround, which is to add the .NET Framework 3.5.1 Feature, that is what I did. All Features can be installed from Server Manager. Note that the .NET Framework 3.5.1 Feature will require you to install some dependencies.
On the Cluster Node Configuration tab, ensure that you use the same SQL Server instance as for node 1, in practice this should mean to simply accept the defaults.
Continue the Wizard until it finishes the installation. You now have, assuming that you haven’t encountered any errors, a SQL Server failover cluster, congratulations.
It is advisable to test the reliability of the cluster at this stage. I would suggest that you run the following tests (these are similar tests to those in part 2):
- Turn off Active node. All cluster resources should failover to the passive node.
- From Failover Cluster Manager move SQL Service to passive node.
- From ESX, switch off the public network on the active node. The cluster should fail over to the passive node. When I tried this, it did not work. I’ll need to investigate
This concludes part three of the series, in the fourth part I will show how to install the second SQL failover cluster.
No comments:
Post a Comment