I foolishly deleted the wrong VM a couple of weeks ago and yesterday I realized that Joomla 2.5 is out. It looks like Joomla 2.5 is the successor to Joomla 1.7. I guess version inflation is kicking off again. At any rate, I wanted to see whether my previous post would work and update it where necessary.
I have created a script to install Joomla, see this post, note that the script is only for Joomla, you will still need to manually install CentOS/RHEL.
Below are the steps needed to install Joomla on CentOS 6.2 using the netinstall iso, note that I'm running this from a VM using VirtualBox on a Windows XP SP3 system (don't ask why):
Note that if no screenshot is shown that means that you should use the default values or your own values (e.g. keyboard, time zone, etc.)
- Download Netinstall iso from http://isoredirect.centos.org/centos/6/isos/i386/ or http://isoredirect.centos.org/centos/6/isos/x86_64/ for 64 bit versions.
- Start a brand new VM and boot from the iso downloaded in step 1.
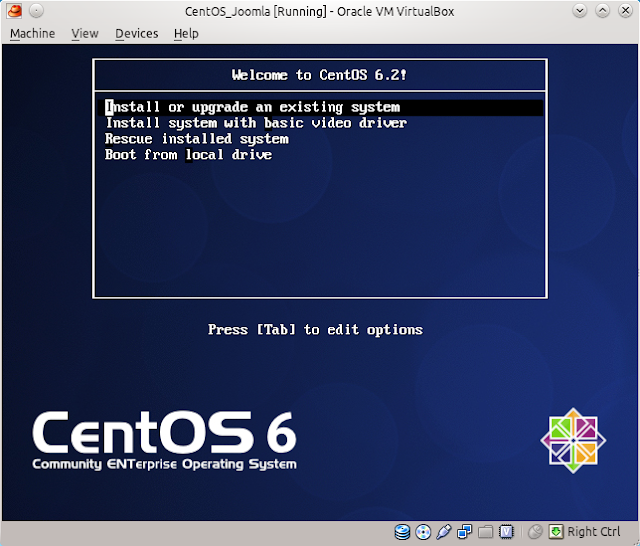
- Select Install or upgrade an existing system.
- Select URL and press OK.
- Enter http://mirror.centos.org/centos/6.2/os/i386/or http://mirror.centos.org/centos/6.2/os/x86_64/ for the 64 bit version.
- I only gave 512 MB of ram to the VM, which meant that the TUI installer ran instead of a graphical interface.
- After selecting the hard drive, I received this prompt. Select Re-Initialize All.
- Once the installation has finished and you are back into your system (remember to remove the mounted iso) I decided to install not only mandatory packages but also optional so I added this line to /etc/yum.conf:
group_package_types=default,mandatory,optional
- Install Apache:
yum groupinstall "Web Server"
- Install MySQL:
yum groupinstall "MySQL Database server"
- Install wget, man, php-mysql, unzip and policycoreutils-python (see step 26 about this package):
yum install man wget php php-mysql unzip policycoreutils-python -y
- Create a temporary directory to extract and download Joomla:
mkdir /joomla; cd /joomla
- Download Joomla (note that this is likely to change, check here for the latest version):
wget http://joomlacode.org/gf/download/frsrelease/16512/72038/Joomla_2.5.1-Stable-Full_Package.zip
- Extract downloaded package:
unzip Joomla_2.5.1-Stable-Full_Package.zip
- Move all files to home web directory:
mv /joomla/* /var/www/html
- Start MySQL and set it to start at boot time:
service mysqld start; chkconfig mysqld on
- Set root's password to MySQL and get MySQL production-ready (Essentially type Y to everything):
/usr/bin/mysql_secure_installation
- Create Joomla User:
mysql -u root -p
CREATE USER 'JoomlaUser'@'localhost' IDENTIFIED BY 'mypass'; - Create Joomla Database:
mysqladmin -u root -p create Joomla
- Provide appropriate privileges to the JoomlaUser user:
mysql -u root -p
GRANT ALL PRIVILEGES ON Joomla.*
TO JoomlaUser@localhost IDENTIFIED BY 'mypass';
where:
'Joomla' is the name of your database
'JoomlaUser@localhost' is the userid of your webserver MySQL account
'mypass' is the password required to log in as the MySQL user - Apply privileges and exit:
flush privileges; \q
- Open Firewall for port 80 and save changes:
iptables -I INPUT -p tcp --dport http -j ACCEPT ; service iptables save
- Turn output buffering off by editing /etc/php.ini change:
output_buffering=4096
to
output_buffering=Off - Create empty configuration.php file and set permissions:
touch /var/www/html/configuration.php
chmod 666 /var/www/html/configuration.php - Start Apache and set it to start on boot:
service httpd start; chkconfig httpd on
- Disable SELinux (I recommend having a look at this post for a fix that will allow you to run SELinux and Joomla. Do ensure that you test everything that you are likely and unlikely to do, e.g. add articles, add blogs, etc..). Alternatively edit /etc/selinux/config and change:
SELINUX=enforcing
to
SELINUX=disabled - Start the Joomla install proper by navigating to:
http://<yourserverip>
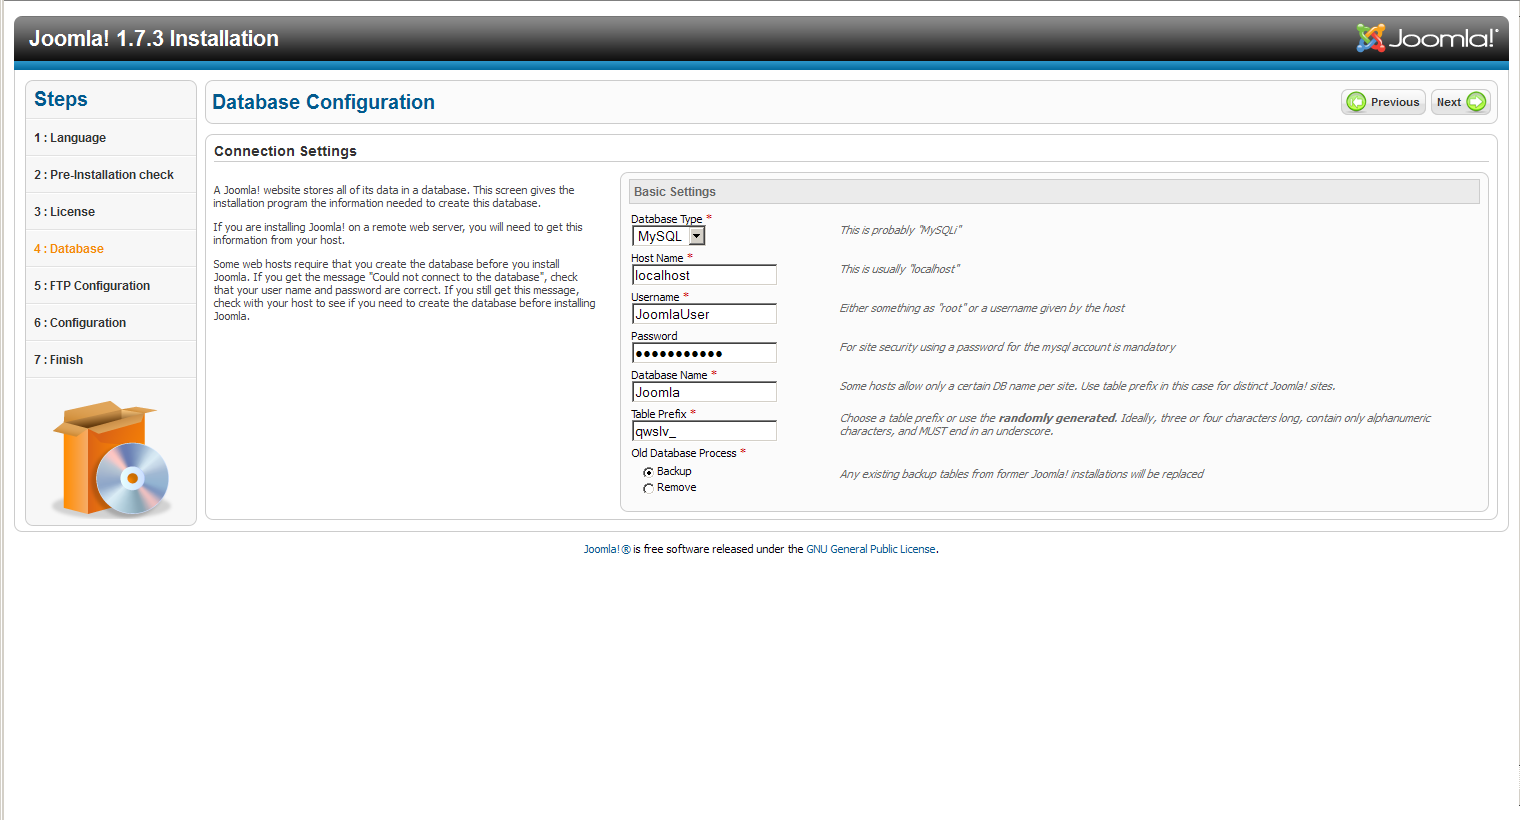
- On step 4 use the following settings:
- I chose to install the sample data on step 6.
- Ensure that you remove the installation directory
rm -rf /var/www/html/installation/
- You can now go and administer your site or view the sample sites if you chose to install the sample data. Enjoy!


Note that if if you do decide to use SELinux, see step 26, you need an extra step to change the context for the Joomla files:
chcon -R unconfined_u:object_r:httpd_sys_content_t:s0 /var/www/html/See this post, if you want to configure multiple instances of Joomla in one server.
Thank you for this information, was very useful.
ReplyDeleteExcellent work.
ReplyDeleteSuccessfully installed Joomla 2.5.6 onto CentOS 6.3 using instructions provided here. It's nice to have all the instructions in one place. Thank you.
ReplyDeleteGreat tutorial but one fix to take in consideration:
ReplyDeleteStep 24: Create empty configuration.php file and set permissions:
the file configuration.php must be inside the joomla directory:
touch /var/www/html/joomla/configuration.php
chmod 666 /var/www/html/joomla/configuration.php
Perfect !!
ReplyDeleteI used your instructions from step 9 to install Joomla on my CentOS 5.8 at home successfully! The only thing additional I had to do was to manually update my PHP version. Thank you for this excellent article!
ReplyDeleteI wish you didn't write the "tip" about disabling SELinux. And I'm guessing one of your troubles with SELinux is that you first create /joomla where you unpack everything and then use 'mv' into /var/www/html. This is the best way how to avoid getting the proper SELinux labels on the files. See this one for more info:
ReplyDeletehttp://www.centos.org/docs/5/html/Deployment_Guide-en-US/rhlcommon-chapter-0017.html
Further, do not ever suggest setting SELinux into 'disabled' mode. Rather use 'setenforce 0' which puts SELinux into _permissive_ mode. This means, issues will be reported into /var/log/audit/audit.log. Do a grep for 'denied' entries here, and paste them through allow2why, which will provide better info why SELinux in Enforcing mode would deny this operation.
Other than that, doing a 'getsebool -a | grep http' will list all apache/http related SELinux booleans settings. Often it's enough to just flip a few of these settings from 'off' to 'on, and it just works. You change these booleans with 'setsebool'.
Don't be terrified of SELinux. It scared a lot of users in the very beginning, and "the whole world" suddenly thought it is just a waste of time to figure out. But the fact is that SELinux works very well. I've exclusively had SELinux enabled on 15-20 different installations the last 3-4 years without any big issues. And from RHEL6 came, it's been even less tweaking and fidling.
SELinux is fairly simple, it just sounds complex because it was complex in the very beginning. But a decade ago, people ignored firewalling because it was so hard and difficult, but we seldom see people recommending to turn off iptables these days because it is so hard to work with. Rather spend time to learn a powerful tool, instead of ignoring it.
did you actually read the post?
Delete(I recommend having a look at this post for a fix that will allow you to run SELinux and Joomla. Do ensure that you test everything that you are likely and unlikely to do, e.g. add articles, add blogs, etc..)
By the way, I forgot one details with setting into 'Permissive' SELinux mode (setenforce 0). That happens instantly, so you don't have to reboot. And switching back to 'Enforced' mode (setenforce 1) is just as instant.
ReplyDeleteUnfortunately, it's not maintained after a reboot, which is why I recommended making the changes to the SELinux configuration, if you are going to run with SELinux disabled.
DeleteI do agree with you that SELinux should be on, but a lot of people seem to be scared of it.
Good morning,
ReplyDeleteI encountered some trouble when I try to install joomla following your instruction. Maybe because I'm new user of linux (CentOS6.3).
First of all, I want to tell that I have installed CentOS6.3 on virtual machine (VirtualBox).
My first problem appear on point 20 where I don't know how I must insert the command from second round:
mysql -u root -p
GRANT ALL PRIVILEGES ON Joomla.* >OK
TO JoomlaUser@localhost IDENTIFIED BY 'mypass'; >?????????????????????
My second problem is referring to point 27, where I type my IP address from virtual machine. IP is found using command "ifconfig", and the results is:inet addr:10.0.2.15. The results is link to Apache server which tell me that everithing work well,etc...
Beside of this, for this short tutorial "Installing Joomla 2.5 on Centos 6.2 (netinstall) " only good words and good job.
I waiting much early is possible some indications or suggestion, to fixed my trouble, and start to explore Joomla.
Thank you in advance for support.
Best regards.
The whole command should be run as a single command.
DeleteGRANT ALL PRIVILEGES ON Joomla.* TO JoomlaUser@localhost IDENTIFIED BY 'mypass';
where the settings come from step 18.
Hi, thanks for your tutorial, this really helps :)
ReplyDeleteI just want to ask, if i want to install multiple joomla websites, for example, i have website 1 and website 2, where do i have to put the joomla files? because when i put it inside /var/www/html or inside /var/www it doesnt work.. it only works when i put the joomla files inside /var/www/html folder.. but how can i install another joomla website? Thank you
It all depends what you are trying to accomplish.
DeleteSay for the sake of argument you have a web1 and web2 directory on /var/www/html/ then you could access each installation by using http:///web1 and http:///web2 respectively. Please remember that you need a second database too.
This clearly is not very good for internet users as they are unlikely to know that they need to go to web1 or web2.
You could set up virtual hosts on Apache, see this link(http://httpd.apache.org/docs/2.2/vhosts/examples.html).
This in practice means either using a different port for the second website or having two dns entries, i.e. two domains, one for each site, which is what you really want if you are exposing the two sites to the web.
As I said, it really all depends on what you are trying to accomplish.
This is all explained here http://manyrootsofallevilrants.blogspot.co.uk/2013/02/multiple-installations-of-joomla-in.html
DeleteJoomla installation page doesn't appears on the step 28. Just apache welcome page
ReplyDeleteAny ideas?
it's probably a SELinux issue.
DeleteYour best bet is to disable it with: setenforce 0.
Do bear in mind that this will not be maintained after a reboot
Thanks for sharing such informative post
ReplyDeleteWeb Design Company in Belgaum | web development company in Belgaum | IT companies in Belgaum | Web Design Companies in Belgaum | Software Companies in Belgaum